Pale Pink

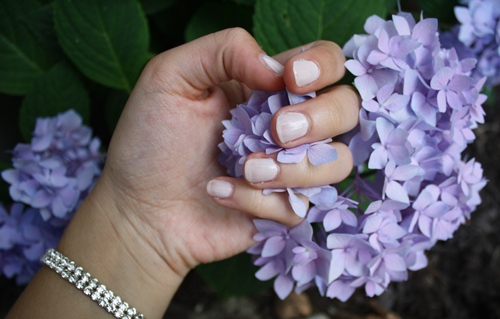
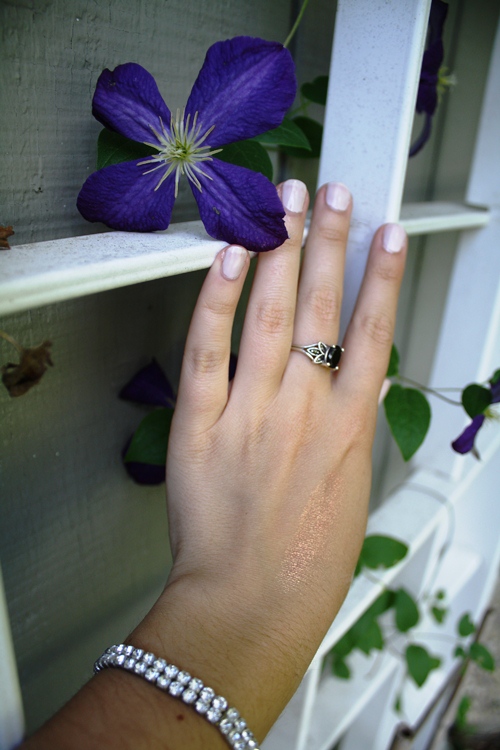
| Nail Polish: L’Oreal Color Riche nail color in How Romantic |

As I stated in this post, pastels and I do not get along very well, and for good reason.  It just doesn’t flatter my olive-y skin tone.  In February I compromised by wearing minty pastel nails, which were on-trend but did not scream “I AM WEARING PASTELS!”  I decided to try pastel nails again with this pale pink shade, and I love it.  I really don’t even consider it a pastel… it is just a pretty pale pink that makes me look tan!  Definitely a win in my book.

[also, that gorgeous shimmery gold on my hand is a swatch of MAC Rubenesque, a makeup product I have been obsessed with for years now… you can probably see why from the stunning color!]

Have a great start to your week!
Color Clash: Pink and Red

| Pink: “Mod Squad” by Essie | Red: “Cherries in the Snow” by Revlon |

Sometimes you just have to break established fashion rules.  I don’t think I’m quite ready to wear red pants with a pink top anytime too soon; however, mixing clashing colors is actually tasteful on nails.  It’s bold and pretty without looking like you tried too hard (or not hard enough!) to be fashionable.

Hope your week has been off to a lovely start!

Winter Pastels

| Inspiration from The Beauty Department |

I am not the hugest fan of pastels, and I will tell anyone that.  It’s a known fact that pastels will be huge this spring, and I just can’t seem to fall for them as hard as everyone else has.  Pastels remind me of the taffeta Easter dresses of my childhood, and light colors do not flatter my skin tone at all.  However, I found a compromise: pastel nails!  Paired with a taupey-gray, minty green looks fresh and on-trend, but is not too “springy” for late February.

Here’s what I used & how I did it:

| Taupe-gray nail polish: Revlon in “Smoky Canvas” |
| Light minty-pastel green: The “Tiana” color in my Disney Princess nail polish set from the Disney store… yes, I shop at the Disney store |
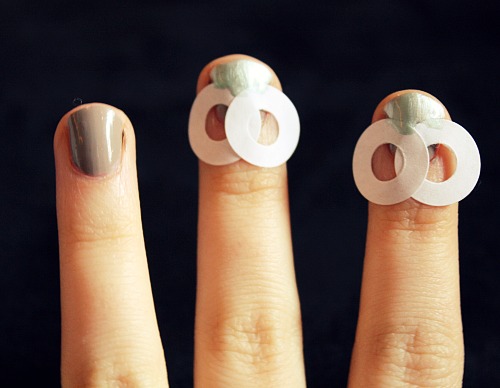
You will also need a few paper hole reinforcement stickers.  You can find them at Target, Staples, etc.

First, paint on a clear base coat.  After it dries, paint the taupe-gray color on nails.

After waiting for the taupe-gray layer to dry completely, put two reinforcement stickers on each nail as pictured, a little more than halfway up the nail.  Paint the mint (or other pastel/any other color) on the top and remove the stickers.  Let dry, and then use a top coat.

Voila!!

Happy Saturday everyone.  I hope your weekend is lovely so far!

Reverse French

Hey there lovelies!  Sorry I’ve been MIA for the past week… after my boyfriend left, I was swamped with schoolwork.  Maybe taking 20 hours wasn’t such a good idea… but regardless, it’s the weekend now and I’m back :]  I decided to try a cool nail look I’d heard of and seen before.  I got the tutorial from the gorgeous girls at The Beauty Department and I know mine aren’t quite as perfect… but I loooove how it turned out anyway!

All you have to do is paint your nails one color (after a base coat of course!) and let it dry completely.  Completely.  Then, use those paper hole-reinforcers to block off the bottom “half-moon” on your nail.  Paint the top color over it, and carefully remove the stickers.  Add a top coat after that’s dried and voila!  A beautiful, easy way to spice up your nails.

I used the color “Raisin the Bar” by Sally Hanson and “Ebony Hates Chris” (ha!  I love nail polish names) by Wet n Wild.  Have any of you tried this reverse French manicure?  How did it turn out, and what colors did you use?

Have a great weekend lovelies!  Hope it’s a great one! :*